Monday, September 20, 2010

Eclipse Party


*sigh* I wish these books had never been made. However, if it gets teens to read, I suppose I can't complain about them too loudly. We had a Twilight party last year in celebration of Edward's birthday (June 20th) - apparently I didn't write about it here. Brief overview of last year then: he had a birthday cake, werewolf kibble, drinks, played a matching quotes game, a trivia game, and a game of chance. We had a ton of prizes, and everyone walked away with something. Fast forward to this year. We had to come up with bigger and better things for this party.

First: We made buttons that said Team Edward and Team Jacob (with corresponding pics, of course), and the teens picked out of a hat and were sorted into the 2 teams.
They could only trade teams if there was someone else on the other team that wanted to trade.

Then: The first game we played was a Bella tug-of-war. (Get it? Because Jacob and Edward fight over her...) Played like a regular game of tug-of war, but we had Bella's pic taped to the middle of the rope. Whichever team pulled her across their line on the floor first won the game. The
winning team each received a New Moon door-hanger. (All of our stuff was New Moon themed b/c it was on clearance at Hot Topic).

Next: We had the teens do a word search. The first to find all of them the fastest won. The winner got to choose from our table of prizes.

Next: Trivia game! The teams had to pick one person to represent them (unfortunately, that person was the only one who could win a prize). The person was pretty much on their own except for they could use a lifeline and ask for help from their team.
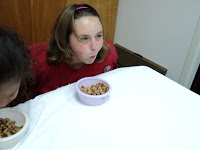
Next: Eating contest! The teens competed against members of their own teams! Team Jacob had to eat Reese's Puff cereal out of dog food bowls and Team Edward had to eat cherry Jell-o out of plastic cups - all with their hands behind their backs! I felt a bit bad for Team Jacob - I should've either put less cereal in or at least given them some milk. Team Edward had a hard time, but once they figured out they could tip the cup over and slurp it off the table, that one ended in no time.

Finally: The chance game. This one is called Vampires and Victims, and basically all you have to do is make up a bunch of slips of paper with the words vampire and victim written on them. Count out an even # of each for the # of teens you have, and
then have them go in a circle each pulling out a slip of paper. Anyone who has a slip with "Vampire" moves on, anyone with "Victim" is out. Totally random. Keep going until you end up with only 1 vampire left, and there's your winner.

We still had prizes after all that, so we just started drawing names and giving out prizes until they were all gone. We didn't have enough for everyone to have a prize this time, but I think they all had a good time regardless.

Boat Building Competiton


This was the project we used to kick-off our summer teen programming. It's a great one if you need something to just throw together because all you have to do is gather a bit of odds and ends and see what they can make out of it. Items we used included:

water bottles
egg cartons
aluminum foil
Ivory soap
cork
paper clips
balloons
duct tape
straws
pint fruit baskets

They had half an hour to make a boat (we also provided Goldfish
and blue Hawaiian Punch during that time), after which we tested it's buoyancy by submerging it in a large plastic container filled with water. We judged boats on looks, buoyancy, and motility and then awarded certificates to the winners. I think the teens had a good time with this, though I didn't see too many of the boys after this one. Weird.

Cupcake Decorating

You may remember that awhile back I did a post on the cake decorating we did last summer. Big hit. Big mess. Tons o'fun - for the teens at least. Well we did it again (sort of) this summer.

Originally, the idea had been brought to me by my literacy coordinator. A couple of the women on the Friends board are cake decorators and wanted to do a program with the teens. I was given the impression this would be a program every week, and I said ok. Well, come to find out later they wanted it to only be a one-time deal, and they wanted to limit the # of kids.
Again, I was ok with this - limiting the # totally made sense. So I made a sign up sheet, limited it to 15 and made up some signs as well as put it on the fliers we sent to the schools. The response was incredible! We were filled up in no time, but I had people write down the names of anyone interested so that perhaps I could persuade the women to at the very least do a second class for anyone on the list.

The day of the class got closer, the women had everything planned out, and then the day before (or possibly the day of - I don't remember) - both women fell ill. I completely understood - we set the date for the next Tuesday, and I called all the teens and told them of the change in days. Well later that day, she called me back saying she'd have to move it because her partner would be out of town that day. I told her that I had already called all the teens and so she agreed to still have it that day after I assured her she'd have plenty of help from our children's staff and our volunteers.

The day before the program rolled around again, and she had to call and cancel because she'd been in the hospital that weekend. Apparently I wasn't caring enough, because I found out later that she was upset with me, but I assured her everything was ok, and I understood that she had been in the hospital, but I was already trying to problem-solve in my brain, so maybe th
at's why I came off cold. I talked to the director, and decided to do the cupcake decorating program myself . There was no way I was calling those teens back to cancel a second time without being able to give them a definite date for the future!

So I called Publix, and they were willing to sell me unfrosted cupcakes by the pound. I grabbed the two awesome cupcake books we had on our shelves, Hello Cupcake and What's New, Cupcake? by Karen Tack and Alan Richardson and went shopping for supplies. We decided to make koi fish out of circus peanuts and roses out of orange slices (both of which are in the books), because they seemed the simplest. I called all the teens on the list (about 30) and invited them all to come - after all, these were relatively simple, I was going to have a lot of help, so why not do them all at once? The teens had a great time (all girls, I believe), and some even got to do a few extras because we had some no-shows. It was a little last minute, but a great success and something I would recommend to any library that has those books!

Bath Jellies and Bombs


So - now that I've gotten back into the swing of things, it's time to catch up on summer.

Bath jelly!
I had never heard of that stuff until a couple of years ago, when I went into a LUSH store for the first time. Never heard of it either? It's basically a gelatin soap. Well at some point in time this summer, I was in a scramble for something to do with my teens, when I stumbled across a recipe for bath jelly. (I was actually looking for a craft to do with school age - they were my test subjects) The recipe is as follows:

1 pkg unflavored gelatin
1/2 c liquid soap
3/4 c hot water
food coloring
scented essential oils

Empty gelatin packet in bowl and add hot water. Stir until gelatin is dissolved and add the liquid soap. Also add any food coloring and essential oil (if desired). Stir gently (so you don't create too many bubbles) and then pour into a container. In the stores it looks like the jelly's been made in large pans and cut into chunks. In this recipe you can just pour it straight into a baby food jar or a plastic container. As long as it's kept cool, it should last for awhile. (I think I've had the one sitting in my office for well over 2 months now). If you see any mould, you should obviously throw it away. I used a pink grapefruit scented grapeseed oil that was leftover from the bath bombs we made at Christmas, which was great because there are a number of grapefruit scented soaps on the market.

But we didn't stop there, no! We also made bath bombs. As I just mentioned, we had actually done this craft before at Christmas. The bath jellies hardly took any time to make, and we had a lot of the supplies leftover from the last time, so I decided to add this to the lot. This craft is a little harder, and takes some supplies that needed to be specially ordered. Here is a basic recipe:

2 parts baking soda
1 part citric acid
1 part cornstarch
essential oil
food coloring
water

The whole process of making a bath bomb is very much dependent on how things feel. Basically, you mix the dry ingredients (set a bit aside for an emergency stash), then add just a couple of drops of food coloring. The mixture will fizz but just mix it in as best you can. Add a teaspoon of oil for scent and continue mixing. Then to add the water. You want to add the most minute amounts that you can b/c if you add too much, the bomb won't set correctly. As you add water, you'll want to mix with your fingers, and you'll know it's perfect when you can squeeze your mixture and it will hold it's shape. Pack it into a mold, turn the mold out onto some cardboard and leave it to dry for 24 hrs. If your mixture was too dry, the mold will fall apart (but you can always add water and remold) - too wet, and it will grow - the bomb will be soft and bubbly and bigger than when you first turned it out (add the emergency dry mix and re-mold). There are guides you can find online that are a lot more detailed than this, but I figured this is a good overview.

The teens LOVED this. It's a bit precise, so you really have to watch out and help them, but it's cool because they can personalize it with the scents and colors they want. We did it at Christmas the first time because they make great gifts, but it's also a great craft to do anytime.

Recycled Picture Frames

Sorry about the hiatus folks, the summer was pretty hectic and I honestly forgot about this blog until just yesterday. However - I am excited to be writing again and sharing the cool stuff we've done with other people. Our first teen programs of the school year were this week, and we started them off by making picture frames out of recycled library cards. Why we have all these cards from other libraries, I'm not sure. We got new cards awhile back, so these must have been sent as samples, but I won't look a gift horse in the mouth. It's always nice to do recycled crafts - so cheap!

All you have to do is cut the cards up and glue them on to a frame. We have a frame die for our Accucut machine and we get mat board donated from a nearby
framery, so that was no cost to us either. I'm sure other picture frames would work well, we were just going with what we've got. The first one I did, I tried to do even sized squares (top right pic), but I think I like having all the different sizes better. The few kids that showed up really liked it (this first one wasn't really well advertised), and I think I'll use it again in the future.

Stay tuned - I'm going to try to catch up on the last few months that I missed!


Wednesday, March 31, 2010

Dyed Easter Eggs


So I didn't last the entire month doing teen tech stuff. Honestly, I kinda forgot there were more than 4 Tuesdays this month, and so I didn't plan as far enough ahead as I should have. However, with Easter coming up this Sunday, it wasn't hard to figure out what to do with them. Everyone loved dyeing eggs, don't they? One of my coworkers directed me to Martha Stewart's website where she has tons of different ways to decorate eggs.


The first way, (and not found on Martha's site) is of the hippie tie-dyed variety. You can find those tie-dye egg kits at the supermarket, but I wasn't really satisfied with the way they do it. The kit that I bought had you putting the dye on, but then rubbing it around to make it look tie-dyed. Lame. So I searched online and found some hints. If you dip a paper towel in a water and vinegar solution, wrap it around the egg, and then drop the color onto the towel, the colors bleed and have a much more realistic effect. When done with your design, take the paper towel off and let the egg dry.

The second technique is marbleizing. Basically, you dye the egg in a light color and let dry. Then, make another darker colored dye in a shallow pan and swirl a bit of oil in it. Take the egg and roll it once through the oil and dye and then pat dry! Easy as pie!

The third (and coolest) technique we used was silk tie-dyeing. You can go to Martha Stewart to get the tutorial. The basics are this: Blow out the eggs (Idk why she doesn't say this, but why put all this work into something so beautiful just to have it destroyed?). Take the egg and wrap it in the silk. Wrap that in a bit of white cloth and secure with string or a rubber band. Pop into boiling water for 20 minutes. Take out, unwrap, and presto! Beautiful eggs. The blue one on the right was made with a singe piece of silk - the white parts are where the fabric creased and it didn't touch. The bottom two on the right were made using several ties (the skinny end) and wrapping it around the egg.

How did the teens like this? Disappointingly, I only had one come today. However, with Spring Break looming this weekend, it's to be expected. My girl really liked dyeing the eggs, though she wasn't too interested in the marbleizing or the silk ties. However, after she saw the results of mine, she wanted to do one. Luckily we had just enough time that she could, but seriously? I kinda wanted to strangle her. All in all it's been good so far - and hey, after blowing out a dozen eggs for my teens to use, I've now got enough quiche to last a week.

Tuesday, March 30, 2010

Teen Tech Month: Week 4


This week's project: felt iPod/mp3 player/cell phone covers! I was super psyched for this one, but was a little underwhelmed by the response I got. My first group wanted to make them, but maybe had a bit of trouble in the execution.

I set out paper and card stock so they could sketch and make templates before they cut (thereby saving tons of felt being wasted by making wrong cuts or drawing directly on the felt and not liking the design and scrapping it). I told them what it was for, but they didn't listen. I had one girl place her design smack dab in the middle of the felt and cut it. Alright, I didn't clarify that ahead of time, so I corrected her - no problem - except on of my other girls wasn't listening and not only drew a design in the middle directly on the felt, but she messed it up and had to draw another - again, in the middle of the felt. This might normally not really be an issue, but with these holders, it takes a lot of felt from one sheet to make, so she rendered that sheet useless for that purpose. This was a day for banging my head against a wall. (To make envelopes- just take a long sheet of felt, width a little larger than your iPod, fold in half, and glue along two sides)

The first girl (who is also the youngest - she's 10), kept saying she didn't know how to do it, and was just in general not trying very hard at all. I had to hold her hand through the entire thing. Then my kid who's, well, special came and since he doesn't have an iPod and wouldn't know the first thing on how to make much of anything, I started cutting out a finger puppet for him. After I was done with his, I thought it was really cute, so I made a Domo puppet for myself. (Domo finger puppet not pictured b/c I don't know what happened to him). It was a difficult program, and I wasn't looking forward to Thursday.

Thursday crowd didn't really want to make iPod covers either. I suspect this has more to do with their ludicrous idea that any thing Apple makes is junk, rather than lack of wanting to craft. I took out my Domo finger puppet and showed it to them, and some of them got on board. One kid made a whole set of Teenage Mutant Ninja Turtles (really basic, stylized puppets, but cool). Once they got started, they really got into making them. I decided to to Spongebob and I think he came out quite nicely.

I guess you really have to know your audience for this one. If your teens are as obsessed with their iPods as I am, this is probably a good project - otherwise I'd skip it. I searched a lot online for a great assortment of felt colors, but for the most part I wasn't satisfied until I found Felt-O-Rama. They have a great variety pack of recycled eco-felt for only $15. I used Liquid Stitch to hold together, but it takes a long time to dry (and teens are often impatient), so I would use a hot glue gun instead.

Tuesday, March 23, 2010

Teen Tech Month: Part 3

Just so you're not wondering what happened - we played video games. I don't have pics, and since I already covered gaming in another post, I won't really talk about it much here.

I did discover an awesome game that one of my teens brought - Mortal Kombat vs. DC Comics. Sweet! They had a great time watching the Joker's bizarre moves and antics. I suppose there could be some debate, as this game was probably rated M for Mature, but I'm fairly certain they're all above 16 at least I wasn't too worried. I did stop them from playing one of the other games they had brought that was a lot worse.

Wednesday, March 10, 2010

Teen Tech Month: Part 2


For our second week we did the most low-tech thing possible: video game sprites. I still counted it though, as we were making video game characters. For a more detailed explanation on how to make them, you can read my post called 8 -bit love, or go to the4yablog.com. She's got a pdf you can download and everything. Be forewarned that one of the links, for smashworldforum or something like that doesn't work anymore, and though I tried finding the emblems on their new forums, I couldn't.
********************************************************
Never fear! I searched tirelessly and found a couple of other great links! There's a bead sprites forum full of people doing this very same thing. Great resource for pictures. All you have to do it use their designs and count the beads, and voila! Sprite recreated! The other is and 8-bit gallery on devianart. I couldn't print out the pics, but if you have a laptop, you can always pull up the site and use that for a reference while you're crafting. I'm so inspired, I think I'm going to make a set of Mario magnets for a couple of friends who are getting married (don't worry - I'm getting them a gift card too).
******************************************************
So far, these things have been a hit, and the teens have made some really amazing stuff. One of my girls did a Sailor Moon character (she changed the colors) that looked amazing. Unfortunately, she finished late and I was cleaning and didn't get a picture of it before she left. so far the consensus seems to be that they can't wait to do it again. This is definitely a program I will use over and over again.

Teen Tech Month: Part 1

I know it's really Teen Tech Week, but rather than having to cram a bunch of cool stuff into one week, I've dubbed March Teen Tech Month at my library and am doing one tech-related things a week.

The first thing we did was an online scavenger hunt. The questions were as follow:

Teen Tech Scavenger Hunt

1. Go to Twitter and write down 3 trending topics for right now


2. Go to Internet Public Library (www.ipl.org) and click on their Teen section. Name at least 2 topics in the index there you can click on.


3. Go to our library homepage. Name 3 of the databases you can search from home or the library.


4. Using our library site again, find and write down the Dewey Decimal number for Customs, Etiquette & Folklore.

5. Go to the Kids section of our website. Find where you can search for books that have been made into movies, and list one that was made into a movie during the year you were born. (Write down the year you were born as well) (http://www.mcpl.lib.mo.us/readers/movies/ is the website we link)


6. Look on our website. Who is author we’ll have coming to do a talk at the end of the month?


7. Look up http://teenfire.ning.com. Write down out what event is going on March 18. (While you’re there, you may want to explore. Or come back when you have more time)


8. Go to www.the4yablog.com and find an activity or craft you’d like to do (Note: You will probably have to look at the archives and other posts to find one you like)


9. Go to our website. Find the elibrary database. Do a search of just newspapers and magazines on the topic “teen pop culture”. Look at the first article that comes up and write down the MLA citation for it.


10. Go to www.fantasticfiction.com. Look up Lemony Snicket. What are the 6th and 11th books in the Series of Unfortunate Events? Whose pseudonym is Lemony Snicket?

Now, a lot of these are specific to our library's website, www.ccpl.sirsi.net, but you could adapt them for your own library. These were all written with the idea of getting teens familiar with some of the stuff we have available online, as well as things out on the web. (Whether any of them remember any of it is an entirely different issue.) We had a number of earbuds left over from summers past, so I gave those out to the participants, and the winner (most right in the least amount of time) won a $15 iTunes gift card. The kids had a hard time with it, but they didn't complain too much - it was good for them - they were building character.

Monday, March 1, 2010

Super Kawaii! Candy sushi!


That's right folks - I tackled candy sushi and lived to tell the tale! This is certainly one of the messier programs I've done recently, but one what was definitely a hit. That's not all though- I also made Domo-kun cupcakes with my teens during that same program. It was sugar overload!!! (Ha ha and then I sent them home to their parents)

Things needed for candy sushi:
-Fruit Roll-ups or fruit leather
-Marshmallow fluff (or you can use butter and melt marshmallows)
- Green Sour Punch Straws (for wasabi - I used green icing though)
- Gummy fish (I used Swedish Fish)

- Chocolate syrup optional (for soy sauce)

-Rice Krispies or other rice cereal

If you know how to make sushi, then there's really no explanation necessary. In case you don't, make it was follows:
-Mix together a couple of tablespoons of marshmallow fluff and about a 1/4 cup of Rice Krispies.
- Spread out Fruit Roll-up on a piece of wax paper, and spread marshmallow mixture on it, leaving about a 1" gap clear on one side of the roll-up.
-Place fish and any other ingredients in the middle of the rice, and then roll up, starting on side with the rice, and finishing with the blank side.
- If you have the time, it wouldn't hurt to put it in the fridge to allow the marshmallow to set up. Otherwise, take your roll and cut it up into bite-sized pieces. Enjoy!

I am lucky enough to have a coworker who owns a lot of sushi dishes and chopsticks, and she lent them to me for this program. There were a few teens who had never used chopsticks before, and trying to show them was an adventure. I personally think it's too much sugar and wanted to puke after eating it, but they loved it!

On to the cupcakes! These are really simple, and as I had only a picture to look at, kinda had to make it up. You will need:
-Chocolate cake mix
-Chocolate frosting
-Chocolate sprinkles
-M&Ms
-Fruit Roll-Ups
-White Icing (You may omit this and the Fruit Roll-ups if you're lucky enough to get your hands on some fondant. I was working on this at the last minute, so I couldn't get that). I think you can figure out what to do with this if you look at the picture. Just take the cupcakes, cover them with icing and sprinkles, and then add M&M eyes, and a mouth w/teeth. Traditionally, Domo has brown eyes, but my teens used all sorts of colors for theirs.

Super Kawaii!

Wednesday, February 17, 2010

Button, button, we've got the buttons!


I make buttons for everything here at the library, so it was only natural that I do a teen program using our button maker. Now we've had our button maker for about 20 years or so, and I understand that not every library has one, but I found links to some rather inexpensive ones here. Ok - really that's the cheapest one. It only has supplies for 10 buttons, but even after buying the machine and supplies, you're still coming off better than most button sites. Remember too - this is an investment. It's something you'll be able to use for years and years to come.

When I make buttons for events, I usually do my designs on the computer. When I announced the program, I let the teens know they could do that, but none did. Instead, I had on hand magazines they could use for pictures, and plain paper and markers if they wanted to be creative and draw their own. Most opted to do the magazine clippings.

I did the programs 2 different ways. With my guys, since I only had a couple show up, I showed them how to use the machine and make the buttons themselves. It was rather successful, but when you haven't had lots of practice, the buttons can come out kinda wonky sometimes. With my girls, I just had them cut out the pictures and then I made the buttons. This was certainly easier, and the buttons came out better, but I was struggling to keep up, and they all made 10 or more buttons. I should've put a cap on the number they could make, but it didn't take them very long for each one, and the program would've been over sooner. Or, they may have actually taken their time when looking through the magazines and been really selective as to which ones they wanted. We'll see. I'll try it a different way when I do it again.

All in all, everyone really enjoyed the program. I know I get a kick out of making my own buttons instead of buying them in the store, and I know the teens liked it too. It's always nice to have something original that you made yourself.

Wednesday, February 10, 2010

8 and 16-bit Love

So once again, I have to credit the4yablog.com for an amazing idea. I had seen in another one of their posts about making video game characters out of fuse beads. Exciting and totally rad! Well I was browsing some more and came across another post about making valentines out of those same beads. Great idea since I was probably going to have to order a ton of them anyways.


I ordered my kit from koolstuff4kids.com. I ordered the Classroom Kit II, which seems to be an ok starter kit. It comes with 6,000 mix color beads, several small clear pegboards, along with ironing sheets and an idea book. Be forewarned that the mix bag does have a somewhat limited palette of colors (bright yellow, goldenrod, light sky blue, dark sky blue, white, lime green, kelly green, black, tan, brown, pink, and red). It seems like an impressive list, but if you want to do really cool detail shading, it can be a bit stilting. That wasn't really an isuue for the hearts, but when we do video game characters next month, I can see it being a problem, so I'll have to order more colors.

I printed out some the examples they had on the blog, and let my teens have at it. The advantage of having the clear pegboards is that you can put pictures underneath to help with the design. Unfortunately, I don't think mine were sized correctly, so they had to count pixels or make up their own designs instead. The project will go a lot faster if the colors are presorted, but if they're not, get them to help you with that - or just don't bother - hey, it takes up more time.

They really seemed to like this one. We used the finished product to make magnets or keychains (as seen above). I haven't done this with my teen boys yet, so I may be updating if they don't really like it. However, I've been pretty spot on with my projects (or they're just really nice and humor me).

Wednesday, January 13, 2010

Cube Art

This was the first program I did for 2010! I'm finally caught up! I would love to say that I'm clever, and I came up with this all on my own, but alas, I am not. My saving grace for this semester is this blog that I stumbled across. This blog has some of the coolest, hippest, most awesome ideas for teen programming that I've come across in awhile.

One that caught my eye (and is super easy), is the link to these cube characters. Cubeecraft has a couple of hundred of designs to choose from. You just click on the one you want, save the pic (or download it - the 2 page characters are in .zip files), print them out, color (if you have a b&w printer like I do), cut and assemble. They are truly self-explanatory, so I can't really give you anymore instruction than that. They've got movie, cartoon, and video game characters. All of my teens loved this - especially my geeky gamer boys. They snatched up 5, and begged to take some home. This is a great, cheap, easy program for anyone to do!

(In case you're wondering - that's [from L to R] Jack Skellington, Rorschach, and the 1-up Mushroom from the Mario games.)

Budding Artists

This wasn't really a program I did specifically for teen and tweens (it was ages 8 and up - I set my tweens at 10), but I still think it warrants at the very least one post.

Budding Artists was a program we've done for two summers now, and it's a concentrated craft program. Most of the crafts we do with our storytimes are short, little 5 minute things that probably get trashed as soon as they get home. This program was a craft that took an hour long, and was hopefully nice enough to stick around a little longer than the 5 minute.

When we originally did this program, the age was set for 5. Really, really bad idea. The 5 year olds just didn't have the attention span for it, and they had to have their parents there helping, which took up space and made it so less kids could attend. So we set the bar higher to 8 (and still had issues with 5 year olds coming in), and things were a little better this year.

We started out simple. I made a Pointillism coloring sheet. Using Seurat’s “A Sunday Afternoon on the Island of La Grand Jatte”, I made a black and white outline. I showed the kids a picture of the original painting, explained what pointillism is, and let them at it with markers. If they wanted to do their own design, they could flip the sheet over and do it there.

We then moved onto collage. Most of them had probably already done one at some point in time, but I did explain that the pictures could all be the same theme, or same color, or have absolutely nothing to do with the other. They definitely enjoyed this one because it's a little more interactive than the coloring sheet.

I believe the next project we did were the stained glass bottles, but because that was already discussed in the last post, I won't write about that again here. The next thing we moved onto after that was Pop art. This ended up being a two week program. I decided to do a giant paper-maiche pencil. I made a framework out of carpenter's cloth, and the kids did the paper-maiche over it. Because of the time needed for that to dry, we had to wait to paint it til the next week. I knew we wouldn't have the room for all of them to paint the pencil at once, so I made up some pop art coloring sheets. I had been taking pictures of the kids that had been participating, but since attendance fluctuated so much, I couldn't have pictures of everyone on hand, so I made sure I had pictures of Campbell's soup cans and Marilyn Monroe printed out as well. The kids really enjoyed working on the giant pencil and were making plans on us doing a whole line of oversized school supplies.

The final thing we did last summer were masks. I wanted to do something that incorporated one of the other creative arts, and this was perfect. We put up a sign in our staff area asking for donations of notions, and I bought some ribbons and things to supplement. We have a mask die-cut from Accucut, and get mat board donations from a neighborhood framer. All I had to do is put the supplies on the table and let them go to town. It was difficult getting some kids to stop adding things on and get them to leave, but they obviously had a good time.

You may be saying to yourself, "But what about that dreamcatcher over to the side there?" That was from our Budding Artists program last summer. I really liked this project, but it was a difficult one to master. For our younger ones (this was when we still had 5 yr olds), I punched holes in the mat board so they could just thread the jute through anyways they liked. The older ones I encouraged to do the proper way, but they still had problems with it. If there had been someone else who could do the weaving as well as I could, and help the kids, it probably would've been better. The dreamcatchers were made with mat board, jute, foam feathers, and plastic pony beads. If I were to do this craft again, I would get sinew, some green twigs, suede, etc - more natural materials to use.

Fake Stained Glass Bottles

You've probably all done this craft at some point in time. You take pieces of tissue paper, a bit of glue, and decoupage the paper onto a jar, bottle, or glass to make it look like stained glass. Easy, right? Anyone can do it. Well I came up with a way to take it to the next level.

The same basic principle is the same, but to make it look more like stained glass, I took some black construction paper, cut out designs, and decoupaged it on. Now I took the hard road when I did it. I put the tissue paper down first, arranging the colors pretty close to the design I wanted. I then drew out my design on the construction paper (eyeballing my tissue already down to get the placement right), and then cut it out and glued it on. This is definitely not recommended for anyone lacking spatial ability and hand-eye coordination.

The much easier method would be to do your design ahead of time and cut it out, so you can use it as a guide when you’re gluing the tissue paper down. Once all the tissue paper is decoupaged, then you can lay you’re design on top and glue it down. Make sure you do several layers of the mod podge (or watered down glue) to ensure your tissue is good and stuck, and your black design won’t just peel up. As you can see, the designs won't line up perfectly, and some of the colors will come outside the lines, but I actually like the look of it - kinda gives it that 50's/60s design charm.

This was a craft that the teens certainly enjoyed, but it is very hard to do if you have time constraints. I only had an hour to do this craft with them, and it was a little hard to get everything done. Quite a few shied away from doing the black paper design, but maybe if we had done this project over the course of two weeks, more of them would've been willing to do it.


Tuesday, January 12, 2010

Cake Decorating

We were planning for our summer kickoff carnival, when we got the brilliant idea to do cake decorating. For our kids' carnival we read "If You Give a Cat a Cupcake" and let the children decorate cupcakes. Then we said "Why should the little kids get all the fun?”

My hope was that I could get one of the people from “Ace of Cakes” to come and do a demo, but I had no such luck. It’s ok – I understand they’re busy people. *sigh* It was then that I had to figure out a plan b, so I turned to Publix. I had been told in the past that they donate supplies to places, so I called the bakery to see what I could work out. They told me I needed to write a letter to corporate and get the donation of supplies approved, and then we could talk about getting a decorator to come and do a demonstration for my teens.

I wrote a letter and faxed it ASAP, and within a week I got a $100 gift card! Score! I called the bakery back, but didn’t get a response. Not a problem. I got the supplies (and 6 hours of baking and making of icing later), and decided to do the program myself. A couple of days before the program, the Publix bakery finally called me back, and agreed to have a decorator come out. She did a demo, showing the teens different techniques, and icing a couple of cakes (both of which we got to keep – awesome!).

While the demo was going, my coworkers and I set up the supplies. I baked a bunch of 13” x 9” cakes and quartered them, and made I don’t know how many batches of buttercream. We used the Wilton recipe, but with so many hands handling it for so long, I’m not sure it was the best idea. The icing got really runny after awhile. Maybe if we had had ice to rest it on when it wasn’t being used things would’ve fared better. Live and learn. The teens had a blast (even the guys), and it is definitely a program I will do again sometime.

Plaster Casts

So I'm having to backtrack a bit because I forgot to write about the programs with did with our teens this summer. Because the theme was "Be Creative", we tried to hit 3 main bases of categories - music, art, and drama. Since my degree is in art, that's always going to be the easiest one for me to do.

Our first program was plaster casts/mold of hands and faces. I forget which company we ordered them from, but we got the plaster sheets in rolls. They're super easy to use. You just have to cut off the length you want, wet it, apply it to what you're molding, and let it dry. This is a very messy craft - so watch out.

We just did hands and faces, but you could do feet too. Make sure you have plenty of baby oil and vaseline. The vaseline is a little harder to get off your skin, but I think it makes it easier for the cast to come off. The hands were really easy to do (though the teens generally had to work in pairs to get it done). The masks were a little tougher because of eyebrows and other hair that can get caught in the plaster and pull. (Make sure you have tough teens that want their faces done - no whiners). The more you layer the plaster, the thicker the cast will be, and the better it will hold up when you're pulling it off your teens.

Make sure you have baby wipes on hand to help get the oil and vaseline off. If you're bathroom is on the other side of the library, a tub with some washcloths and warm water would be a good idea too. The teens really liked this one, but if you have more than a handful of kids, make sure you have some volunteers or parents who are brave (and competent) enough to help you out.

Henna and Temporary Tattoos

I’ve done henna tattoos on myself for years, and it’s something I’ve wanted to do ever since I started doing teen programs. My original idea was to do something on the culture of India, and have that as part of it. As it was, I ended up doing a program with temporary tattoos. I bought some face paint at Walmart (which was actually pretty good), but they only had one kit, and I had some pre-made henna in a tube at home, so I brought it along just in case.

I had warned some of the kids about it ahead of time and asked their parents – just to make sure it was ok. Henna can last several weeks, though I read somewhere recently if you use something that has alpha hydroxy acid in it (like sunscreen) on the area you tattooed, then it breaks the dyes down, and washes off more easily.

The teens had a lot of fun with this program, though I ended up

doing most of the work. They were more than welcome to use the face/body paint that I had bought, but few did. They all wanted the henna done, and because it lasts so long, I was the only person I wanted doing it. Besides, there was only one tube.

This is a great opportunity for your teens to get creative (provided that you have enough face paint to go around). I got out books that they could look through, and they really enjoyed looking at and learning about the henna tattoos and the traditions behind them. Since it was a popular program, I think maybe I will do my idea of a program on the culture of India - I'm sure they'll enjoy it.